Teaching in the winter can be tough. Many of us find ourselves at school before the sun makes its grand appearance and are still there long after it quits for the day. What is it that’s causing the daylight hours to hasten by providing us additional hours of darkness?
Get students engaged with phenomena related to different ways light and darkness occur throughout the year.
The Science of a Solstice
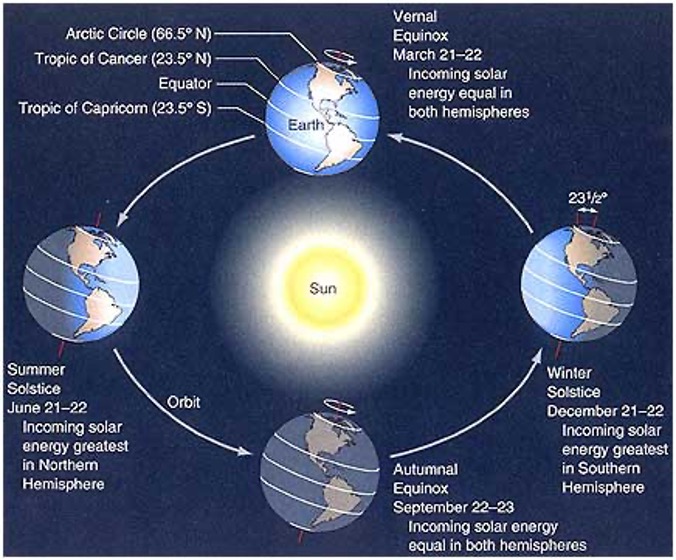
The Earth, while approximately a sphere, isn’t traveling in a perfectly vertical fashion. While many of us envision the North Pole —Santa and Elves included—at the top of the Earth, the Earth is actually tilted approximately 23.5 degrees as it travels around its elliptical path. Due to this tilt, latitudes in the northern hemisphere are tilted toward the sun in summer and away from the sun in winter. This affects what part of the Earth is illuminated and, as a result, we experience fewer hours of daylight during the winter months. The shortest of these days is called the Winter Solstice (December 21st). The shortest day also means the longest night.
Embracing the Dark Side: Model it
We learn that the tilt of the Earth is responsible for the seasons and the change in the amount of daylight, but this can be a little tricky to visualize. Why not have students build and test models of how this is possible?
To model this concept, all you need are some flashlights and mini-“Earths” (balls). Using a ball to represent the Earth, you can show that as the Earth revolves around the sun (a flashlight), if the tilt of the Earth is kept constant, the amount of light changes depending on where you’re located on the Earth’s surface.
- Students can make observations of the model and then make inferences about what a person standing at different latitudes would observe over the course of a day as the year goes by.
- Students may then construct arguments that are supported by observable evidence.
(1-ESS1-1, MS-ESS1-1, Crosscutting Concepts: Cause and Effect, Systems and System Models.)
Collaboration Across the Continent
Latitude plays an important role in how much daylight different regions of the Earth receive.
- As the solstice approaches, encourage students to record the sunrise and sunset times for their location and graph the number of daylight hours in a day.
- Take to social media and have your students connect and collaborate with students from other locations to get comparable data points. Google Sheets and Maps can be shared between the student scientists for the weeks surrounding the solstice to help them visualize and make sense of the phenomena.
(1-ESS1-2, Crosscutting Concept: Patterns.)
As the seasons change, the angle of the sun in the sky will also change.
- Students can track these changes in the length and direction of shadows and share this data with one another. If all groups have a common object such as a meter stick, data can be collected at the same time each day and compared with groups from across the nation.
(5-ESS1-2, Crosscutting Concept: Patterns.)
Seeing Without Sight
Nothing garners curiosity like something unknown. Students always want to know the ending of a story, or how something “got that way.” Why not capture that curiosity with a mystery box?
- Place some everyday objects in a sealed box. Have your students record their observations using their senses —other than sight — and make predictions about what’s inside. Whether or not you tell them they’re correct is up to you!
Going Batty
It’s hard to see in the dark, and yet some animals, like bats, have adapted to make the most of this environment. Students can use tricks to understand bats’ echolocation.
- Discuss how bats use high-frequency sound waves to generate pictures of their environments.
- Then have students try it for themselves, either blindfolded or using Go!Motion sensors, which emit sound waves and then “listen” for the reflected signal. By knowing the speed of sound and the time it took the return signal to reach the detector, you can plot the distance of objects vs. time.
- Why not set up some obstacles in a box or your room and have students slowly turn around while using the probe to get a “picture” of what’s in their area? You can have students either move around the room or use data provided by other groups to generate a model of the placement of objects in the room.
(4-LS1-2, MS-LS1-8, Crosscutting Concepts: Systems and System Models, Cause and Effect.)
Embracing the Light Side: Wintergreen Sparking Candy
Wintergreen candies emit a blue glow when you eat them (a phenomenon that students can really sink their teeth into), and this happens for two reasons. First, as you break a sugary hard candy with your teeth, it emits a very small amount of UV light that the nitrogen in the air absorbs and then re-emits as light we can see. This is called triboluminescence, but it doesn’t explain why wintergreen flavored candies seem to work the best. The effect is a benefit of the flavoring itself: oil of wintergreen or methyl salicylate. Wintergreen oil absorbs UV light and when you chew the candy containing it, emits the light back as a visible blue light. Experiment with different types of hard candy and different brands flavored with wintergreen (Lifesavers, Altoids, Tic-Tacs, even gum), and record observations about which candy is the most shocking treat.
Black Light
Encourage students to examine the effects of black lights on different colors (items that are white or neon, appear to glow) and then to experiment with different substances (green plants emit a reddish glow as the chlorophyll reacts with the light). Students can even use their new understandings to communicate in secret messages using items that appear to be clear, yet react in the UV, such as petroleum jelly or tonic water.
Fireworks
No discussion about fun things that emit light would be complete without mentioning fireworks.
Bringing fireworks into the classroom may not be the best idea, but you can examine the metal salts used to color fireworks in a safe way.
- Guide students to see how the electrons in various elements get excited when heated and then emit light of different colors as the electrons de-excite. Just make sure that proper safety guidelines are followed and that everyone is a safe distance away. By putting a small amounts of the metal salts in ethanol and carefully igniting them, you can show your students a dazzling array of colors (sodium: yellow; calcium: orange/red; strontium: red; copper: green/blue; potassium: purple/pink). These light emissions based on electron transitions in atoms can be tied into spectral line observations in astronomy and help students gain insights into how we know what composes stars and far away worlds.
(HS-ESS1-2, Crosscutting Concept: Energy and Matter.)

Examining the Nature of Light
What is light? Rachel Dixon shares some great ideas for helping your students think about how light works by constructing and testing models.
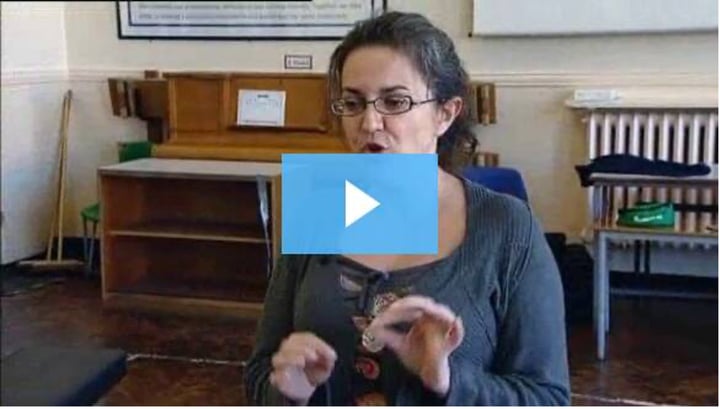
- By examining how light interacts with objects such as mirrors, she helps her students try to figure out how to have eyes in the back of their heads.
(1-PS4-2, 1-PS4-3, 4-PS4-2, Crosscutting Concept: Cause and Effect.)
- After exploring the concept of reflection, students can broaden their understanding and explore how light interacts with transparent and opaque materials of different colors.
(MS-PS4-2, Crosscutting Concept: Structure and Function.)
- Have upper division students extend this activity to lenses, and then model how light is focused in the eye and how glasses help correct various vision problems.
(4-PS4-2, Crosscutting Concept: Cause and Effect.)
While science is a natural avenue for incorporating light and darkness, that doesn’t mean that the science department should have all the fun. Consider looking for ways to celebrate the changing seasons in any subject!


